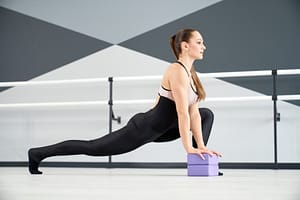
key takeaways
- A foundational yoga pose that stretches the hip flexors, front thigh, and quadriceps.
- Stretches hips and thighs, relieving tension in the lower back.
- Regular practice of Low Lunge can improve focus, concentration, and lung health.
- Avoid Low Lunge if you have knee injuries
What is the Low Lunge Pose (Anjaneyasana)?
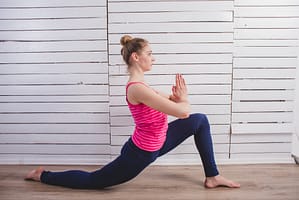
Low Lunge Pose, or Anjaneyasana, is a key yoga pose. It stretches the front thigh and quads, and it engages the hip flexors. To enter this posture, start in downward-facing dog. Then, step your right foot forward between your hands. Your right foot must align with your front knee.
⇒Note: How to Do Half Forward Bend (Ardha Uttanasana): A Complete Guide for Yoga Beginners
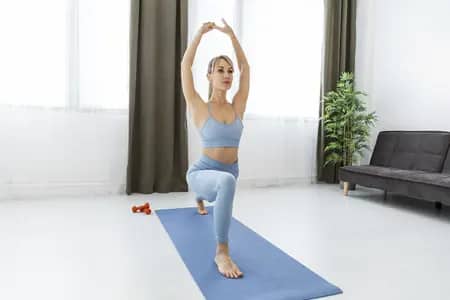
Lower your left knee to the yoga mat, allowing the back foot to rest with toes tucked or untucked, which helps to deepen the stretch in the right thigh. As you inhale, lift your arms overhead and lift your chest, creating space in your upper body. Remember to listen to your body and adjust your back knee and glutes to avoid back pain. To exit, gently step your right foot back into the downward-facing dog.
⇒Note: Mastering the Extended Side Angle Pose: A Comprehensive Guide to Utthita Parsvakonasana
In a yoga class, a dynamic sequence might include this pose. It would flow from standing forward bends to restorative poses. As you hold Anjaneyasana, focus on your breath and exhale as you deepen the pose, feeling the stretch in your hamstring and front foot. A free trial of this new yoga experience can help you explore the benefits of the low lunge while enhancing your overall practice.
Benefits of Low Lunge for Beginners
For beginners, the low lunge is a fantastic pose to incorporate into your yoga practice. This pose stretches the hips and thighs, helping to relieve tension in the low back. This comfortable stretch not only opens the hips but also prepares your body for more challenging poses like high lunge and cobra pose.
⇒Note: Mastering Reverse Warrior: Step by Step Guide
Enhancing Focus and Concentration
Enhancing focus and concentration is crucial for productivity and mental clarity. Regular lung-strengthening activities can greatly improve oxygen flow. It’s vital for brain function. Breathing exercises and aerobic workouts boost lung capacity. They foster a sharper, more attentive mind.
⇒Note: Mastering Pyramid Pose (Parsvottonasana): A Step-by-Step Guide to Yoga’s Intense Side Stretch
Strengthening Lower Body
Strengthening the lower body offers numerous benefits for lung health. Exercises like squats and lunges boost circulation. This can improve lung function. Also, a strong lower body improves posture. This allows for deeper breathing and better oxygen intake.
Moreover, activities that focus on the lower body can elevate heart rate, promoting overall cardiovascular health, which is closely linked to lung efficiency. This synergy between muscle strength and respiratory function can lead to improved endurance and stamina.
Opening the Hips low lungs benefits
Opening the hips with Low Lung pose is essential for relieving tight hips. Regularly stretching the hip flexors can be particularly beneficial for those who spend long hours sitting, helping to alleviate discomfort and improve overall movement.
Runners should do hip-opening exercises. They improve hip flexibility and mobility. This boosts performance and lowers injury risk.
Improving Balance and Stability low lungs
Improving balance and stability presents unique challenges that challenge your balance and require focus. Engaging in exercises can help maintain stability while developing strength.
These activities are essential to develop better balance, enhancing coordination and proprioception. They increase the body’s awareness of where it is in space, leading to greater control and movement efficiency.
How to Practice Low Lunge: Step-by-Step Instructions
Getting into the Right Position
To get into the right position for your practice, start on all fours with your hands on the floor and your right knee beneath your hip. Gently place your hands shoulder-width apart, hip-width apart with palms facing down. As you transition into downward facing dog pose, tuck your back toes under and press your heels toward the floor. From here, you can move into a low lunge, allowing your knee to the floor and feeling a comfortable stretch in the left hip.
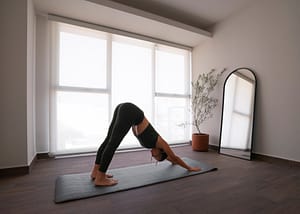
Design by Freepik
As you build strength, remember to lift your torso and draw your shoulders away from your ears. You can also incorporate a backbend to engage the fronts of the thighs. If you feel tightness, stretch back until you feel a comfortable stretch, ensuring your body aligns properly.
Design by Freepik
This pose information is essential for your practice, helping you to connect with your favorite poses and deepen your understanding of the body through yoga. For further guidance, refer to related articles or consult your yoga instructor.
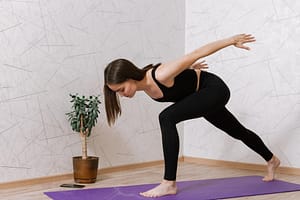 Design by Freepik
How to Align Your Body in Low Lunge
To achieve proper alignment in low lunge, begin by stepping your foot forward while keeping your back leg extended. Ensure your knee to the mat is directly below your hip for stability.
Place your hands to the floor or on blocks for additional support, allowing your torso to lengthen and your hips to sink.
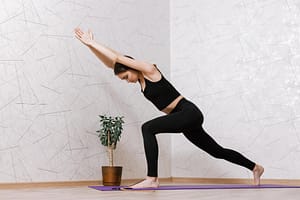 Design by Freepik
Remember, practicing the right yoga techniques will help you maintain balance and focus throughout the pose.
What to Do with Your Hands and Arms
When practicing yoga, knowing what to do with your hands and arms can enhance your poses. In a low lunge, for example, extending your arms upward can open your chest and improve stability. Experiment with different arm positions to find what feels best for your body during each practice.
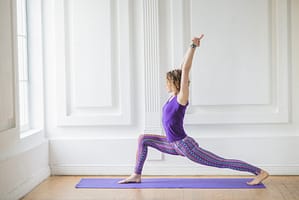 Design by Freepik
In addition, engaging your arms properly can create a sense of grounding. In other poses, such as a warrior stance, your arms can either reach out to the sides or remain bent. Remember, the goal is to maintain balance while feeling connected to the ground.
Repeat Pose on the Other Side
It’s time to swap and repeat the same pose on your left side after finishing the pose on your right. As you move through the pose, keep in mind to breathe deeply and maintain correct alignment. Once you’ve done so many times, proceed to the following series of poses.
Contraindications and Precautions for Low Lunge Pose
Low lunge boosts flexibility and strength. But, watch for some risks. It’s vital to align properly to avoid strain. If unsure about safety, consult a healthcare professional.
Who Should Avoid Low Lunge?
Individuals with knee injuries or severe hip issues should avoid this pose to prevent strain. Additionally, those with recent surgeries or chronic back pain should practice caution and consult a healthcare professional before attempting it.
Furthermore, pregnant individuals should modify their practice or seek guidance to ensure safety.
Variations of Low Lunge Pose
Variations of Low Lunge Pose offer an exciting opportunity to improve your practice. You can explore alternative transitions, such as moving into Crescent Lunge or pressing forward into Lizard Lunge. Each variation invites a deeper exploration of your body’s capabilities.
For a different challenge, consider rotating down to Head-to-Knee pose. With dozens of transitions to explore, it’s essential to find what works for you and tailor your practice to your unique needs.
Crescent Lunge vs. Low Lunge Crescent Lunge
When it comes to yoga and fitness, the Crescent Lunge and Low Lunge are two popular poses that serve different purposes and offer unique benefits. Understanding the distinctions between them can help practitioners make informed choices about their practice.
**Crescent Lunge** (Anjaneyasana)
Design by Freepik
The Crescent Lunge is a dynamic pose that requires balance, strength, and flexibility. In this pose, one leg is extended back with the knee lifted, while the front knee is bent at a 90-degree angle, directly over the ankle. The arms can be raised overhead, creating length in the spine and an opening in the chest.
Modifying the Pose for Your Level
When practicing yoga or any physical activity that involves specific poses, it’s essential to recognize that each individual has unique strengths, limitations, and goals. Modifying poses not only helps you to maintain safety and prevent injury but also allows you to optimize your practice according to your current level of experience and flexibility. Here are some tips on how to effectively modify poses for your level:
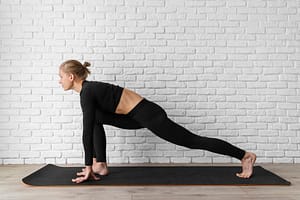 Design by Freepik
1. **Listen to Your Body**: Pay attention to how your body feels in each pose. If you experience discomfort or strain, it’s a sign to modify the pose. Learning to distinguish between a healthy stretch and pain is crucial.
2. **Use Props**: Props like blocks, straps, bolsters, and blankets can provide additional support and stability. For instance, if you cannot reach the floor in a forward bend, using a block can help you maintain proper alignment without overstretching.
Design by Freepik
4. **Shorten the Range of Motion**: If a pose feels too intense or challenging, reduce the depth or range of movement. For instance, in a lunge, you can keep your back knee on the ground instead of lifting it, allowing for a gentler stretch.
